728x90
반응형
https://bobo12.tistory.com/331
◎ th:each 예제
▷ 타임리프에서 반복문 처리
1. scr/main/java/com.shop.controller → ThymeleafExContorller 클래스 수정
@GetMapping(value = "/ex03") public String thymeleafExample03(Model model){ List<ItemDto> itemDtoList = new ArrayList<>(); for(int i=1; i<=10; i++){ ItemDto itemDto = new ItemDto(); itemDto.setItemDetail("상품 상세 설명" + i); itemDto.setItemNm("테스트 상품" + i); itemDto.setPrice(1000*i); itemDto.setRegTime(LocalDateTime.now()); itemDtoList.add(itemDto); } model.addAttribute("itemDtoList", itemDtoList); return "thymeleafEx/thymeleafEx03"; } }
2. src/main/java/templates.thymeleafEX → thymeleafEx03.html 생성
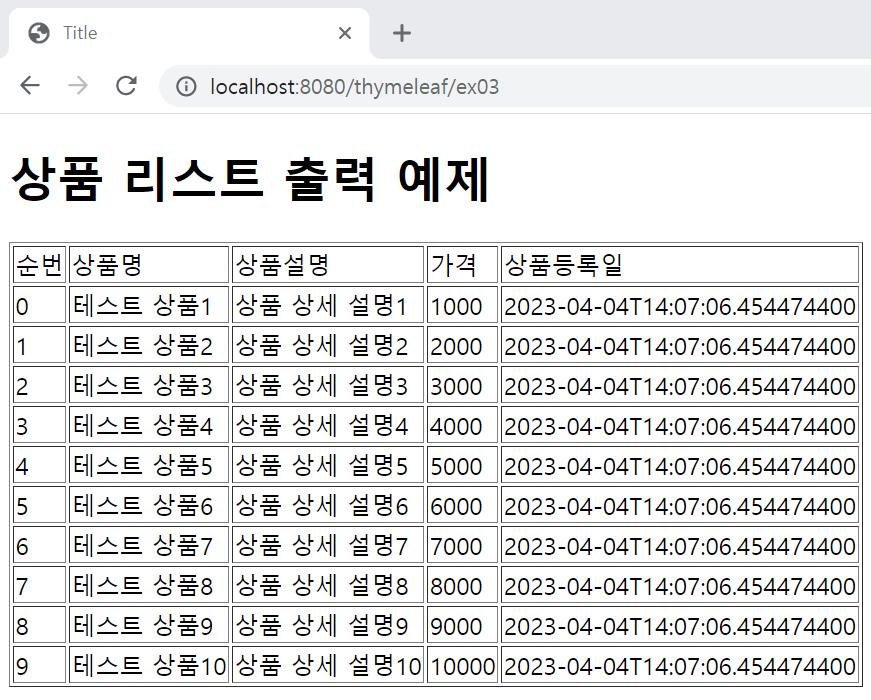
<!DOCTYPE html> <html xmlns:th="http://www.thymeleaf.org"> <head> <meta charset="UTF-8"> <title>Title</title> </head> <body> <h1>상품 리스트 출력 예제</h1> <table border="1"> <thead> <tr> <td>순번</td> <td>상품명</td> <td>상품설명</td> <td>가격</td> <td>상품등록일</td> </tr> </thead> <tbody> <tr th:each="itemDto, status: ${itemDtoList}"> <td th:text="${status.index}"></td> <td th:text="${itemDto.itemNm}"></td> <td th:text="${itemDto.itemDetail}"></td> <td th:text="${itemDto.price}"></td> <td th:text="${itemDto.regTime}"></td> </tr> </tbody> </table> </body> </html>
http://localhost:8080/thymeleaf/ex03
위의 경로로 접속하면 아래와 같이 HTML이 적용되어 테이블이 생성된 화면이 출력되는 것을 확인할 수 있습니다.
◎ th:if, th:unless
▷ th:if, th:unless : 타임리프에서 조건문 처리
▷ 순번이 짝수이면 ‘짝수’를, 출력하고 짝수가 아니라면 ‘홀수’를 출력 예제
1. scr/main/java/com.shop.controller → ThymeleafExContorller 클래스 수정
...(생략)... @GetMapping(value = "/ex04") public String thymeleafExample04(Model model){ List<ItemDto> itemDtoList = new ArrayList<>(); for(int i=1; i<=10; i++){ ItemDto itemDto = new ItemDto(); itemDto.setItemDetail("상품 상세 설명" + i); itemDto.setItemNm("테스트 상품" + i); itemDto.setPrice(1000*i); itemDto.setRegTime(LocalDateTime.now()); itemDtoList.add(itemDto); } model.addAttribute("itemDtoList", itemDtoList); return "thymeleafEx/thymeleafEx04"; } }
2. src/main/java/templates.thymeleafEX → thymeleafEx04.html 생성
<!DOCTYPE html> <html xmlns:th="http://www.thymeleaf.org"> <head> <meta charset="UTF-8"> <title>Title</title> </head> <body> <h1>상품 리스트 출력 예제</h1> <table border="1"> <thead> <tr> <td>순번</td> <td>상품명</td> <td>상품설명</td> <td>가격</td> <td>상품등록일</td> </tr> </thead> <tbody> <tr th:each="itemDto, status: ${itemDtoList}"> <td th:if="${status.even}" th:text="짝수"></td> <td th:unless="${status.even}" th:text="홀수"></td> <td th:text="${itemDto.itemNm}"></td> <td th:text="${itemDto.itemDetail}"></td> <td th:text="${itemDto.price}"></td> <td th:text="${itemDto.regTime}"></td> </tr> </tbody> </table> </body> </html>
http://localhost:8080/thymeleaf/ex04
위의 경로로 접속하면 아래와 같이 순번이 "홀수, 짝수"로만 나타나는 것을 볼 수 있습니다.

◎ th:switch, th:case 예제
▷ 여러 개의 조건을 처리할 때 사용
1. src/main/java/templates.thymeleafEX → thymeleafEx04.html 수정
...(생략)... <tbody> <tr th:each="itemDto, status: ${itemDtoList}"> <!-- <td th:if="${status.even}" th:text="짝수"></td>--> <td th:switch="${status.even}"> <span th:case="true">짝수</span> <span th:case="false">홀수</span> </td> <td th:unless="${status.even}" th:text="홀수"></td> ...(생략)...
http://localhost:8080/thymeleaf/ex04
위의 경로로 접속하면 if문과 같이 순번이 "홀수, 짝수"로만 나타나는 것을 볼 수 있습니다.
◎ th:href 예제
▷ th:href : Thymeleaf에서 링크를 처리하는 문법
▷ Absolute URL : ‘http://’ 또는 ‘https://’로 시작
▷ Context-relative URL : 가장 많이 사용되는 URL 형식이며 애플리케이션의 서버 내부를 이동하는 방법.
웹 애플리케이션 루트에 상대적인 URL을 입력
1. scr/main/java/com.shop.controller → ThymeleafExContorller 클래스 수정
...(생략)... @GetMapping(value = "/ex05") public String thymeleafExample05(Model model){ return "thymeleafEx/thymeleafEx05"; } }
2. src/main/java/templates.thymeleafEX → thymeleafEx05.html 생성
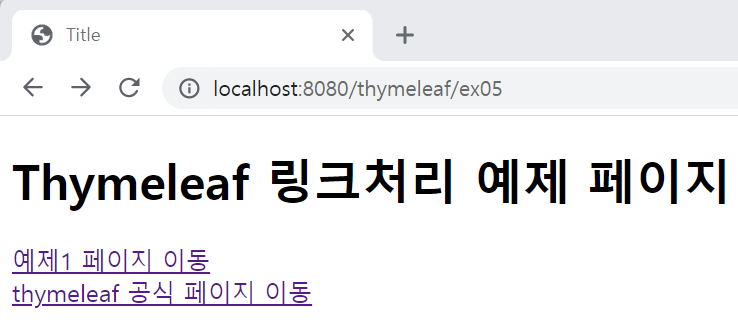
<!DOCTYPE html> <html xmlns:th="http://www.thymeleaf.org"> <head> <meta charset="UTF-8"> <title>Title</title> </head> <body> <h1>Thymeleaf 링크처리 예제 페이지</h1> <div> <a th:href="@{/thymeleaf/ex01}">예제1 페이지 이동</a> </div> <div> <a th:href="@{https://www.thymeleaf.org/}">thymeleaf 공식 페이지 이동</a> </div> </body> </html>
http://localhost:8080/thymeleaf/ex05
위의 경로로 접속하면 아래와 같이 링크가 두 개 나타나고 클릭시 이동되는 것을 확인할 수 있습니다.
▷ 링크 이동 시 파라미터를 전달해야 하는 경우
1. src/main/java/templates.thymeleafEX → thymeleafEx05.html 수정
<!DOCTYPE html> <html xmlns:th="http://www.thymeleaf.org"> <head> <meta charset="UTF-8"> <title>Title</title> </head> <body> <h1>Thymeleaf 링크처리 예제 페이지</h1> <div> <a th:href="@{/thymeleaf/ex01}">예제1 페이지 이동</a> </div> <div> <a th:href="@{https://www.thymeleaf.org/}">thymeleaf 공식 페이지 이동</a> </div> <div> <a th:href="@{/thymeleaf/ex06(param1='파라미터 데이터1', param2 = '파라미터 데이터2')}">thymeleaf 파라미터 전달</a> </div> </body> </html>2. scr/main/java/com.shop.controller → ThymeleafExContorller 클래스 수정
...(생략)... @GetMapping(value = "/ex06") public String thymeleafExample06(String param1, String param2, Model model){ model.addAttribute("param1", param1); model.addAttribute("param2", param2); return "thymeleafEx/thymeleafEx06"; } }
3. src/main/java/templates.thymeleafEX → thymeleafEx06.html 생성
<!DOCTYPE html> <html xmlns:th="http://www.thymeleaf.org"> <head> <meta charset="UTF-8"> <title>Title</title> </head> <body> <h1>파라미터 전달 예제</h1> <div th:text="${param1}"></div> <div th:text="${param2}"></div> </body> </html>
http://localhost:8080/thymeleaf/ex05
위의 경로로 접속하면 아래와 같이 링크가 세 개 나타나고 클릭시 이동되는 것을 확인할 수 있습니다.
마지막 링크를 누르면 ex06번에 파라미터들이 전달된 것을 확인할 수 있습니다.


th:each, th:if, th:unless, th:switch, th:case, th:href를 이용해서 테이블을 출력해보고 html에서 조건문을 이용해 보았습니다.
링크 누르면 해당 페이지가 연결되도록 할 수도 있네요!
페이지 레이아웃 지정하는 방법도 한 번 공부해볼게요~!!
많은 분들의 피드백은 언제나 환영합니다! 많은 댓글 부탁드려요~~

728x90
반응형
'BackEnd > Spring Boot' 카테고리의 다른 글
| [스프링 부트 쇼핑몰 프로젝트 with JPA] Thymeleaf 1(컨트롤러, Spring Boot Devtools) (3) | 2023.04.07 |
|---|---|
| [스프링 부트 쇼핑몰 프로젝트 with JPA] 개발 환경 구축 2(Lombok 라이브러리 이용, MySQL 설치) (0) | 2023.04.07 |
| [스프링 부트 쇼핑몰 프로젝트 with JPA] 개발 환경 구축 1(스프링 부트) (0) | 2023.04.07 |
| [스프링 부트 쇼핑몰 프로젝트 with JPA] Spring Data JPA 2(Repository 설계, 쿼리 메소드) (0) | 2023.04.04 |
| [스프링 부트 쇼핑몰 프로젝트 with JPA] Spring Data JPA 1(ORM, 상품 엔티티, 영속성) (0) | 2023.04.04 |


