https://bobo12.tistory.com/322
5. 이벤트 처리와 HTML 처리
▷ Ajax 처리까지는 완료, 남은 작업은 화면에서 버튼 등에서 발생하는 이벤트 감지하고 Ajax 호출 결과 반영
(1) 댓글 목록 처리
▷ 별도의 <div>를 생성해서 댓글의 목록 처리를 해야 함.
▷ 게시글과 관련된 화면 아래쪽에 <div>를 추가 후 나중에 화면의 모습을 파악할 수 있도록 간단한 텍스트 구성
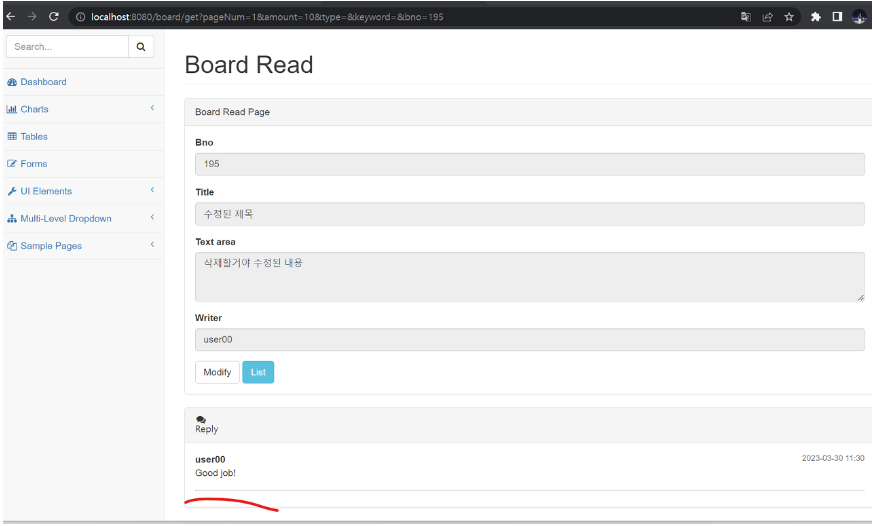
... (생략) ...


<div class="row">
	<div class="col-lg-12">

		<!--  /.panel -->
		<div class="panel panel-default">
			<div class="panel-heading">
				<i class="fa fa-comments fa-fw"></i> Reply //확인필요
			</div>

			<!-- /.panel-heading -->
			<div class="panel-body">

				<ul class="chat">
					<!-- start reply -->
					<li class="left clearfix" data-rno='12'>
						<div>
							<div class="header">
								<strong class="primary-font">user00</strong>
								<small class="pull-right text-muted">2023-03-30 11:30</small>
							</div>
							<p>Good job!</p>
						</div>
					</li>
					<!-- end reply -->
				</ul>
				<!-- ./ end ul -->
			</div>
			<!-- /.panel .chat-panel -->
		</div>
	</div>
	<!-- ./ end row -->
</div>

... 생략 ...
▷ 댓글의 목록은 <ul> 태그 내에서 <li> 태그를 이용해서 처리
▷ 각 <li> 태그는 하나의 댓글을 의미하므로 수정이나 삭제 시 이를 클릭함
▷ 수정이나 삭제 시에는 반드시 댓글 번호(rno)가 필요하므로 data-rno 속성을 이용해서 이를 처리함
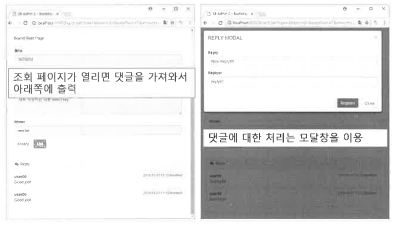
브라우저에는 아래쪽에 댓글의 목록이 보이게 됩니다.
◎ 이벤트 처리
▷ 게시글의 조회 페이지가 열리면 자동으로 댓글 목록을 가져와서 <li> 태그를 구성해야함
▷ 이에 대한 처리는 $(document).ready() 내에서 이루어 지도록 함
◎ get.jsp 내용 추가
... (생략) ... <script> $(document).read(function () { var bnoValue = '<c:out value="${board.bno}"/>'; var replyUL = $(".chat"); showList(1); function showList(page){ replyService.getList({bno:bnoValue,page: page || 1 }, function(list) { var str=""; if(list == null || list.length == 0) { replyUL.html(""); return; } for (var i=0, len = list.length || 0; i<len; i++) { str +="<li class='left clearfix' data-rno='"+list[i].rno+"'>"; str +=" <div><div class='header'><strong class='primary-font'>"+list[i].replyer+"</strong>"; str +=" <mall class='pull-right text-muted'>"+list[i].replyDate+"</small></div>"; str +=" <p>"+list[i].reply+"</p></div></li>"; } replyUL.html(str); }); // end function } // end showList }); </script> ... (생략) ...
showList()는 페이지 번호를 파라미터로 받도록 설계하고, 파라미터가 없는 경우에는 자동으로 1 페이지가 되도록 설정
브라우저에서 DOM 처리가 끝나면 자동으로 showList()가 호출되며 <ul> 태그 내에 내용으로 처리됨
만약 1페이지가 아닌 경우라면 기존 <ul>에 <li>들이 추가되는 형태
위의 처리가 끝나고 나면 브라우저에서 조회페이지는 아래와 같이 해당 게시글의 댓글 순번대로 보입니다.

◎ 시간에 대한 처리
▷ xml, json 형태로 데이터를 받을 때는 순수하게 숫자로 표현되는 시간 값이 나오게 되어 있으므로 화면에서 이를 변환해서 사용하는 것이 좋음.
▷ 날짜 포맷의 경우 문화권마다 표기 순서 등이 다르기 때문에 화면에서 포맷을 처리하는 방식을 권장
▷ 해당일에 해당하는 '시/분/초'를 보여주고, 전날 등록된 데이터들은 '년/월/일' 등을 보여주는 경우가 많음
◎ reply.js 내용 추가
... (생략) ... function displayTime(timeValue) { var today = new Date(); var gap = today.getTime() - timeValue; var dateObj = new Date(timeValue); var str = ""; if (gap < (1000 * 60 * 60 * 24)) { var hh = dateObj.getHours(); var mi = dateObj.getMinutes(); var ss = dateObj.getSeconds(); return [ (hh > 9 ? '' : '0') + hh, ':', (mi > 9 ? '' : '0') + mi, ':', (ss > 9 ? '' : '0') + ss ].join(''); } else { var yy = dateObj.getFullYear(); var mm = dateObj.getMonth() + 1; // getMonth() is zero-based var dd = dateObj.getSeconds(); return [ yy, '/', (mm > 9 ? '' : '0') + mm, '/', (dd > 9 ? '' : '0') + dd ].join(''); } }; return { add : add, get : get, getList : getList, remove : remove, update : update, displayTime : displayTime }; })();
◎ get.jsp 내용 수정
▷ displayTime()은 Ajax에서 데이터를 가져와 HTML을 만들어 주는 부분에
'replyService.displayTime(list[i].replyDate)'의 형태로 적용... (생략) ... for (var i=0, len=list.length || 0; i<len; i++) } str +="<li class='left clearfix' date-rno='"+list[i].rno+"'>"; str +=" <div><div class='header'><strong class='primary-font'>"+list[i].replyer+"</strong>"; str +=" <small class='pull-rigth text-muted'>"+replyService.displayTime(list[i].replyDate)+"</small></div>"; str +=" <p>"+list[i].reply+"</p></div?</li>"; } </script> ... (생략) ...
작성된 displayTime()을 적용하면 24시간이 지난 댓글은 날짜만 표시되고, 24시간 이내의 글은 시간으로 표시됨

(2) 새로운 댓글 처리
▷ 댓글 목록 상단에는 버튼을 하나 추가해서 사용자들이 새로운 댓글을 추가할 수 있도록 준비함
◎ get.jsp 내용 추가
... (생략) ...

<div class="row">
	<div class="col-lg-12">
		<!--  /.panel -->
		<div class="panel panel-default">
		<!-- <div class="panel-heading">
				<i class="fa fa-comments fa-fw"> Reply</i>
			</div>
		-->
		<div class="panel-heading">
		<i class="fa fa-comments fa-fw"></i> Reply
			<button id='addReplyBtn' class='btn btn-primary btn-xs pull-right'>New Reply</button>
		</div>

			<!-- /.panel-heading -->
			<div class="panel-body">

				<ul class="chat">
					<!-- start reply -->
					<li class="left clearfix" data-rno='12'>

... (생략) ...
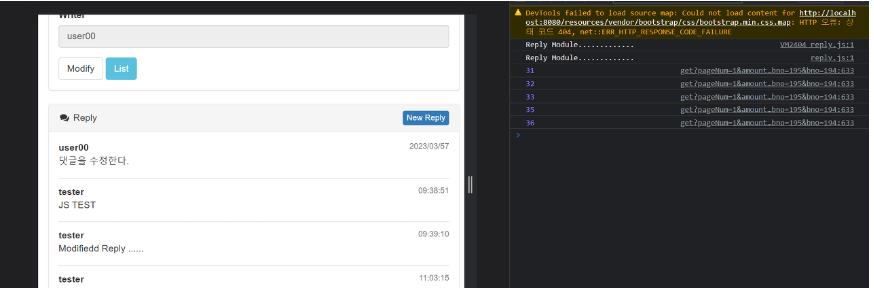
브라우저에는 댓글 목록의 오른쪽에 'New Reply' 버튼이 보입니다.

◎ get.jsp 내용 추가
▷ 댓글 추가는 모달창을 이용해서 진행, 별도로 화면 중앙에 위치하므로 태그를 추가하는 위치는 신경 쓰지 않아도 됨
▷ 스크립트 태그의 시작 전에 코드 추가
... (생략) ... <!-- Modal --> <div class="modal fade" id="myModal" tabindex="-1" role="dialog" aria-labelledby="myModalLabel" aria-hidden="true"> <div class="modal-dialog"> <div class="modal-content"> <div class="modal-header"> <button type="button" class="close" data-dismiss="modal" aria-hidden="true">×</button> <h4 class="modal-title" id="myModalLabel">REPLY MODAL</h4> </div> <div class="modal-body"> <div class="form-group"> <label>Reply</label> <input class="form-control" name='reply' value='New Reply!!!!!'> </div> <div class="form-group"> <label>Replyer</label> <input class="form-control" name='replyer' value='replyer'> </div> <div class="form-group"> <label>Reply Date</label> <input class="form-control" name='replyDate' value=''> </div> </div> <div class="modal-footer"> <div class="modal-footer"> <button id='modalModBtn' type="button" class="btn btn-warning">Modify</button> <button id='modalRemoveBtn' type="button" class="btn btn-danger" >Remove</button> <button id='modalRegisterBtn' type="button" class="btn btn-primary">Register</button> <button id='modalCloseBtn' type="button" class="btn btn-default" data-dismiss="modal">Close</button> </div> </div> </div> <!-- /.modal-content --> </div> <!-- /.modal-dialog --> </div> <!-- /.modal --> ... (생략) ...
모달창은 브라우저에서 댓글에 대한 여러 작업(CRUD)에서 활용할 것이므로 필요한 모든 내용을 담도록 하고 각 작업에 맞게 버튼이나 입력창이 보이거나 감춰지도록 합니다.
◎ 새로운 댓글의 추가 버튼 이벤트 처리
▷ 댓글 목록 상단의 New Reply를 클릭하면 화면에서는 모달창을 아래와 같이 보이게 처리함
▷ 모달과 관련된 객체들은 여러 함수에서 사용할 것이므로 바깥쪽으로 빼두어 매번 jQuery를 호출하지 않도록함
◎ get.jsp 내의 댓글 추가 시작 시 버튼 이벤트 처리
... (생략) ... <script type="text/javascript" src="/resources/js/reply.js"></script> <script> $(document).ready(function () { var bnoValue = '<c:out value="${board.bno}"/>'; var replyUL = $(".chat"); showList(1); function showList(page){ replyService.getList({bno:bnoValue,page: page || 1 }, function(list) { var str=""; if(list == null || list.length == 0) { replyUL.html(""); return; } for (var i = 0, len = list.length || 0; i<len; i++) { str +="<li class='left clearfix' date-rno='"+list[i].rno+"'>"; str +=" <div><div class='header'><strong class='primary-font'>"+list[i].replyer+"</strong>"; str +=" <small class='pull-right text-muted'>"+replyService.displayTime(list[i].replyDate)+"</small></div>"; str +=" <p>"+list[i].reply+"</p></div></li>"; } replyUL.html(str); }); // end function } // end showList var modal = $(".modal"); var modalInputReply = modal.find("input[name='reply']"); var modalInputReplyer = modal.find("input[name='replyer']"); var modalInputReplyDate = modal.find("input[name='replyDate']"); var modalModBtn = $("#modalModBtn"); var modalRemoveBtn = $("#modalRemoveBtn"); var modalRegisterBtn = $("#modalRegisterBtn"); $("#addReplyBtn").on("click", function(e){ modal.find("input").val(""); modalInputReplyDate.closest("div").hide(); modal.find("button[id !='modalCloseBtn']").hide(); modalRegisterBtn.show(); $(".modal").modal("show"); }); }); ... (생략) ...
사용자가 'New Reply' 버튼을 클릭하면 입력에 필요 없는 항목들은 안보이게 처리하고, 모달창을 보이게 합니다.

◎ 댓글 등록 및 목록 갱신
▷ 새로운 댓글의 추가는 필요한 댓글의 내용(Reply)과 댓글의 작성자(Replyer) 항목만으로 추가해서 모달창 아래쪽의 'Register' 버튼을 클릭해서 처리함
◎ get.jsp 내의 새로운 댓글 추가 처리
... (생략) ... modalRegisterBtn.on("click", function(e){ var reply= { reply: modalInputReply.val(), replyer: modalInputReplyer.val(), bno:bnoValue }; replyService.add(reply, function(result){ alert(result); modal.find("input").val(""); modal.modal("hide"); }); }); ... (생략) ...댓글이 정상적으로 추가되면 경고창을 이용해서 성공했다는 사실을 알려주고, 등록한 내용으로 다시 등록할 수 없도록 입력 항목을 비우고 모달창을 닫아줍니다.
댓글이 정상적으로 처리되었지만 목록 자체는 갱신된 적이 없으므로 화면에서 새로 등록된 댓글이 보이지 않습니다. 이러한 문제 때문에 댓글을 추가한 후에는 다시 댓글의 목록(showList(1))을 갱신할 필요가 있습니다.
◎ get.jsp 내용 추가
... (생략) ... modalRegisterBtn.on("click", function(e){ var reply= { reply: modalInputReply.val(), replyer: modalInputReplyer.val(), bno:bnoValue }; replyService.add(reply, function(result){ alert(result); modal.find("input").val(""); modal.modal("hide"); showList(1); // << 추가 }); }); ... (생략) ...기존의 코드에 showList(1)을 추가해서 댓글이 추가된 후 그 사이에 추가되었을지 모르는 새로운 댓글도 가져오도록 합니다.

(3) 특정 댓글의 클릭 이벤트 처리
▷ 댓글의 목록에서 내용이 모두 출력되기 때문에 해당 댓글을 수정하거나 삭제하는 경우 별도로 클릭이 발생
▷ 댓글의 수정과 삭제는 원칙적으로는 로그인한 사용자가 해당 댓글의 작성자인 경우에만 허락되어야함
▷ 현재까지 로그인에 대해서는 처리된 적이 없으므로 코드에서는 어떠한 댓글도 수정/삭제가 되도록 작성함
▷ 동적으로 Ajax를 통해 <li> 태그들이 만들어지면 이후에 이벤트를 등록해야 하기 떄문에 일반적인 방식이 아닌
'이벤트 위임' 의 형태로 작성
▷ 위임이란 이벤트를 동적으로 생성되는 요소가 아닌 이미 존재하는 요소에 이벤트를 걸어주고
나중에 이벤트의 대상을 변경해줌
◎ get.jsp 댓글 클릭 이벤트 처리
... (생략) ...

$(".chat").on("click", "li", function(e){
			var rno = $(this).data("rno");
			console.log(rno);

		});

... (생략) ...
▷ jQuery에서 이벤트를 위임하는 방식은 이미 존재하는 DOM 요소에 이벤트를 처리하고 나중에 동적으로 생기는 요소들에 대해서 파라미터 형식으로 지정함
▷ 위의 경우 <ul> 태그의 클래스 chat을 이용해서 이벤트를 걸고 실제 이벤트의 대상은 <li> 태그가 되도록함
브라우저에서 확인해보면 이벤트는 <ul>에 걸었지만, 각 댓글이 이벤트의 this가 된 것을 확인할 수 있습니다.
위의 코드가 정상적으로 동작한다면 화면에서는 댓글을 볼 수 있는 모달창을 처리해 줍니다.
모달창을 브라우저에서 보여주는 코드는 특정한 댓글을 클릭했을 때 보여주도록 합니다.
◎ get.jsp 댓글 이벤트 처리... (생략) ... // 댓글 조회 클릭 이벤트 처리 $(".chat").on("click", "li", function(e){ var rno = $(this).data("rno"); replyService.get(rno, function(reply){ modalInputReply.val(reply.reply); modalInputReplyer.val(reply.replyer); modalInputReplyDate.val(replyService.displayTime(reply.replyDate)) .attr("readonly", "readonly"); modal.data("rno", reply.rno); modal.find("button[id !='modalCloseBtn']").hide(); modalModBtn.show(); modalRemoveBtn.show(); $(".modal").modal("show"); }); }); ... (생략) ...
댓글을 조회하는 행위는 현재의 경우 모든 내용이 화면에 있기 때문에 별도로 조회할 필요는 없지만, 원칙적으로 Ajax 로 댓글을 조회한 후 수정/삭제를 하는 것이 정상입니다.

(4) 댓글의 수정/삭제 이벤트 처리
▷ 댓글의 삭제는 가장 간단하게 결과를 보여주는 작업만을 처리하면 되므로 가장 간단하게 처리할 수 있음
▷ 삭제/수정 작업 모두 작업이 끝난 후에 다시 댓글목록을 갱신해야함.
◎ get.jsp 내에서 댓글 수정
... (생략) ...

modalModBtn.on("click", function(e){
			var reply = {rno:modal.data("rno"), reply: modalInputReply.val()};

			replyService.update(reply, function(result){
				alert(result);
				modal.modal("hide");
				showList(1);
			});
		});

... (생략) ...
◎ get.jsp의 댓글 삭제 내용 추가
▷ 댓글 삭제 역시 모달창에 있는 data-rno 값을 이용해서 처리함
... (생략) ... modalRemoveBtn.on("click", function (e) { var rno = modal.data("rno"); replyService.remove(rno, function(result) { alert(result); modal.modal("hide"); showList(1); }); }); ... (생략) ...
이벤트 처리와 HTML 처리 할 때 댓글의 목록 처리, 페이지 이동시 목록 호출, 시간 처리, 새로운 댓글 처리 등을 시행해봤습니다.
다양한 이벤트 처리를 통해 CRUD의 기능들을 구현해 볼 수 있었습니다.
다음 글에서는 댓글의 페이징 처리하는 것을 구현해볼게요!!
많은 분들의 피드백은 언제나 환영합니다! 많은 댓글 부탁드려요~~

'BackEnd > Spring' 카테고리의 다른 글
| [코드로 배우는 스프링 웹 프로젝트] ch17 Ajax 댓글 처리 8 (0) | 2023.04.03 |
|---|---|
| [코드로 배우는 스프링 웹 프로젝트] ch17 Ajax 댓글 처리 7(댓글의 페이징 처리) (0) | 2023.04.03 |
| [코드로 배우는 스프링 웹 프로젝트] ch17 Ajax 댓글 처리 5 (댓글의 목록, 삭제 및 갱신, 수정, 조회 처리) (0) | 2023.04.03 |
| [코드로 배우는 스프링 웹 프로젝트] ch17 Ajax 댓글 처리 4 (JavaScript의 모듈화) (0) | 2023.04.02 |
| [코드로 배우는 스프링 웹 프로젝트] ch17 Ajax 댓글 처리 3 (ReplyController를 이용한 CRUD) (0) | 2023.04.02 |


